

VAPEVO007215
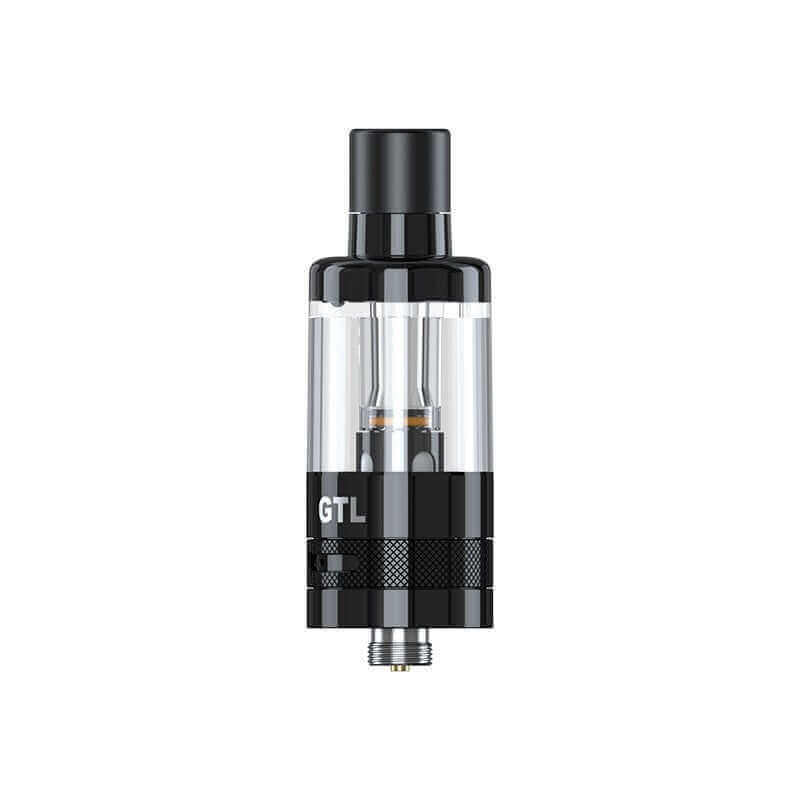
ELEAF GTL D20 - Clearomizer 3ml 20mm
Key features
Capacity :
Battery type :
Maximum power (W) :
Free shipping*
*Free delivery in metropolitan France and Europe. Offer subject to conditions. See our delivery policies.
A problem with your product? No need to return the product thanks to our efficient and simplified after-sales service. To find out more, see our return policies.
Earn loyalty points.
You earn loyalty points by purchasing this product. Thanks to the EVO Points loyalty program, many attractive rewards await you! Learn more
Volume discount
The more products you buy, the lower the unit price. Thus, our prices adapt to your needs and offer you a reduction proportional to the quantity ordered.
Frequently bought together
If you have not found your answer, do not hesitate to consult the sections below or contact us. We will respond to you as soon as possible.
FAQ’s
Embark on our FAQ adventure, where you will find answers to all your existential questions about navigation, delivery, our loyalty program and many other mysteries to solve!
Delivery & Return
Free delivery in metropolitan France and Europe. Offer subject to conditions. See our delivery policies.
A problem with your product? No need to return the product thanks to our efficient and simplified after-sales service. To find out more, see our return policies.
Customer Service
You can contact us using the contact form and selecting the option that best suits your request.
Responsabilité environnementale
Nous adorons nos clients, mais nous adorons aussi notre planète. C'est pourquoi nous établissons des partenariats avec des acteurs engagés dans une démarche éco-responsable.
Product information
Overview
Sobriety, this is the watchword that ELEAF gave itself when designing the atomizer GTL D20. It is true that the manufacturer has not gone overboard and we are delighted. The GTL D20 has lines that could not be simpler, devoid of any visual overload, and the designers have gone so far as to refuse any pattern, allowing themselves only the GTL inscription under the tank. The result is a device that seduces with its sobriety.
Associé au kit iStick i40, l'atomiser GTL D20 will perfect the vape. The user can only be conquered by its tank which offers a large capacity of 3ml. Then, he will appreciate the filling which is easily done from the top. He just slides the top cap and he will have access to the filling hole. This atomizer also has an adjustable airflow positioned on its base. It is a rotating ring that covers and uncovers several perforations. The vaper can thus choose between a tight pull or a more airy pull.
Otherwise, as far as resistors are concerned, there is compatibility with the Eleaf GTL series. 2 of these resistors are provided:
- A 0.8 ohm GTL resistor (12-18W)
- A 1.2 ohm GTL resistor (7-13W)
These resistances designed in kanthal and equipped with a mesh structure provide constant flavors with each puff. In addition, their replacement is simple. Simply separate the tank from the base, remove the used resistor, then insert the new resistor into the same housing thanks to a plug-and-play system.
Eleaf signs a faultless with the atomizer GTL D20. This practical, easy-to-use and high-performance model will have a great career in the vape market.
Presentation video
Tech Specs
Manufacturing country
Dimensions
Diameter
Eliquide volume
Filling
Type of inhalation
Adjustable airflow
Drip tip
What’s in the Box
Content
Advice & Precautions
Using an electronic cigarette kit with a clearomizer also involves advice and precautions to ensure safety and proper functioning. Here are some of the tips and precautions to consider:
- Read the user manual: Make sure you understand how your kit works by reading the manual provided by the manufacturer.
- Select quality e-liquids: Use e-liquids specially designed for electronic cigarettes and from reputable brands.
- Filling the clearomizer: Fill the clearomizer according to the manufacturer's instructions, avoiding overfilling. Make sure not to pour liquid into the central conduit.
- Check the coil resistance: Make sure the coil resistance is compatible with the power output of your kit. Replace the coil if it is worn.
- Priming the coil: Before first use or when replacing the coil, prime the coil by applying a few drops of liquid directly to the coil.
- Adjust the power: Adjust the power output of your kit based on coil resistance and your personal preference.
- Avoid leaks: Make sure the clearomizer is assembled correctly to avoid leaks. Keep the clearomizer upright when not in use.
- Check the battery: Make sure the battery in your kit is in good working order. If the battery shows signs of damage, replace it.
- Store your e-liquids safely: Store your e-liquids in a cool, dry place and out of the reach of children and animals.
- Clean regularly: Clean the clearomizer and components regularly to avoid the accumulation of liquid residue.
- Avoid vaping in fire sensitive areas: As with a box mod, avoid vaping in areas where smoking is prohibited, as this can be considered a potential source of fire.
- Comply with local laws: Follow local vaping regulations. Some areas may prohibit the use of electronic cigarettes.
- Keep spare parts: It can be helpful to have spare spools, seals and additional components on hand.
By following these tips and precautions, you can use your e-cigarette kit with a clearomizer safely and enjoy an enjoyable vaping experience. Be sure to always consult the specific user manual for your kit, as recommendations may vary depending on the model.
